1. General settings
You can enter the general Content Upgrades PRO settings by clicking “Settings” in the plugin’s menu in your WordPress dashboard.
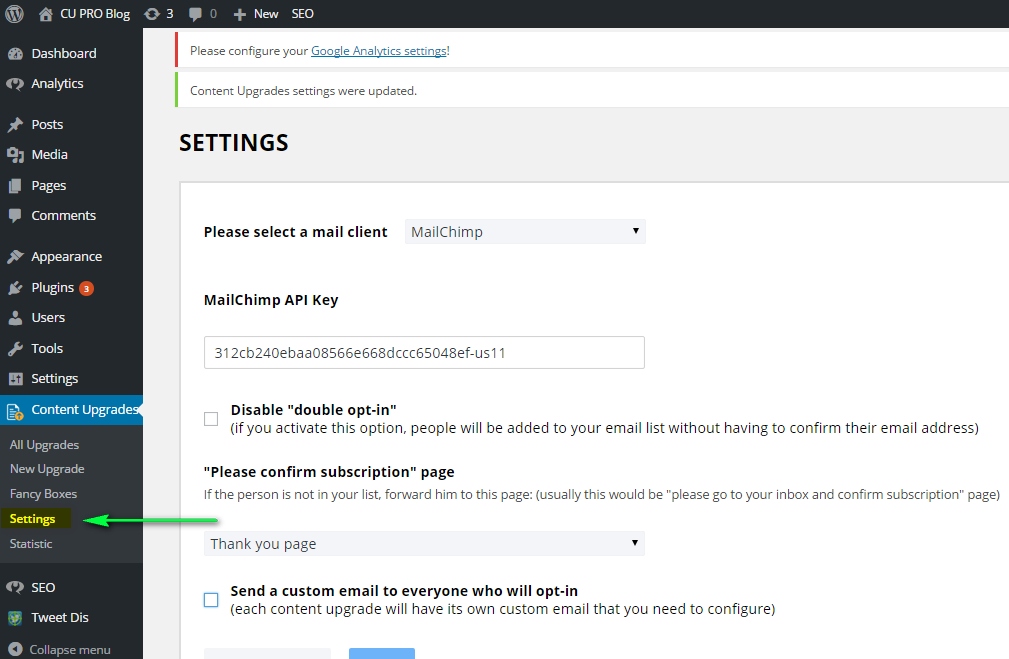
1.1. Choosing your e-mail client
Today you can use one of the 4 popular e-mail clients with Content Upgrades PRO WordPress plugin:
- MailChimp
- Aweber
- GetResponse
- OntraPort
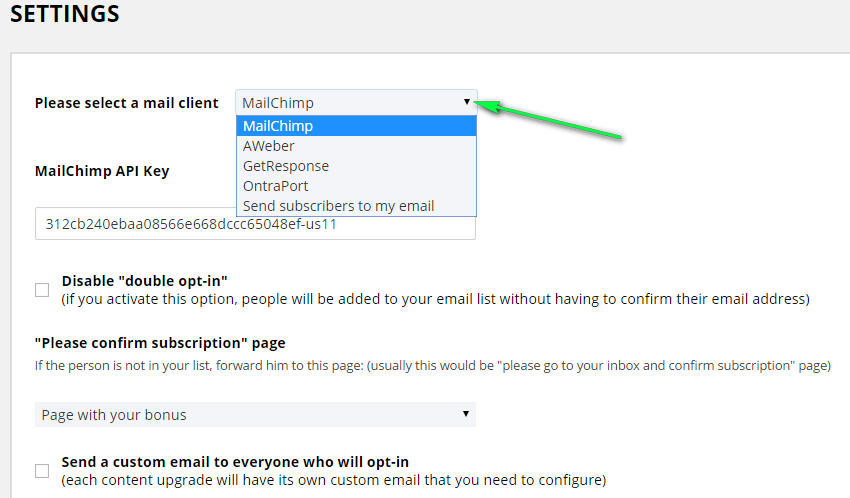
Content Upgrades PRO plugin also allows you to use your own e-mail to send your subscribers to.
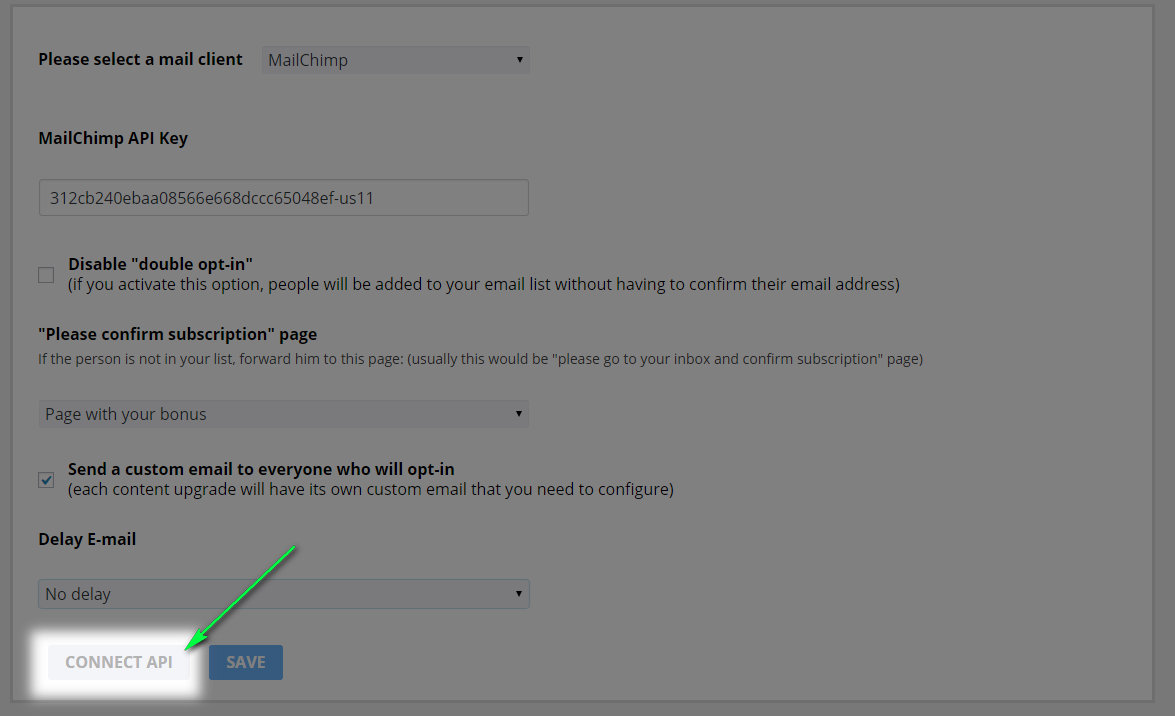
1.2. Setting up your e-mail client’s API key
Each of these e-mail clients provides API keys in order to connect Content Upgrades PRO to your mail account.
For example, in MailChimp you can get an API key in your Profile – Extras – API Keys
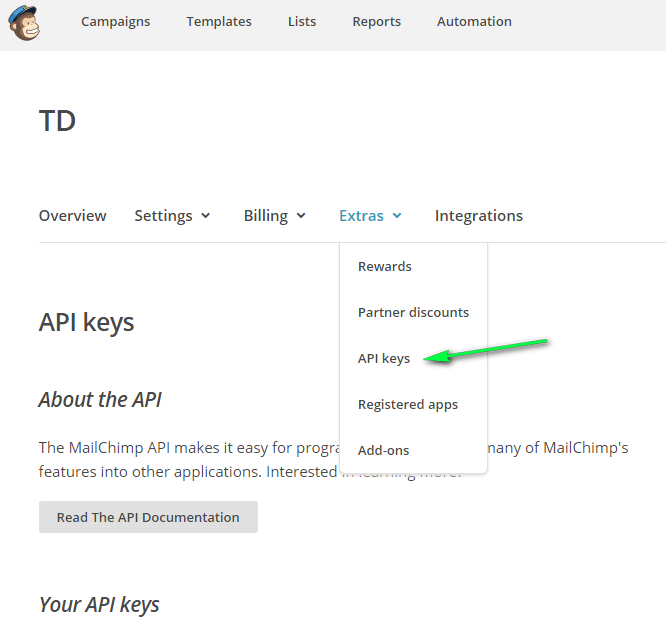
You can either create a new API key or use the existing one.
API key must be pasted into “/E-mail client name/ API Key” box in Content Upgrades PRO general setting menu.
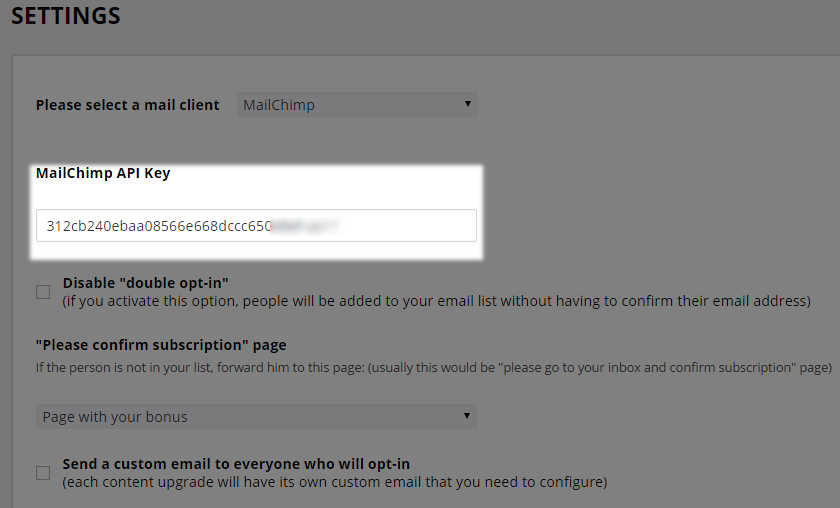
Click “CONNECT API” button.
You will get a message of successful API connection with the connected email lists.
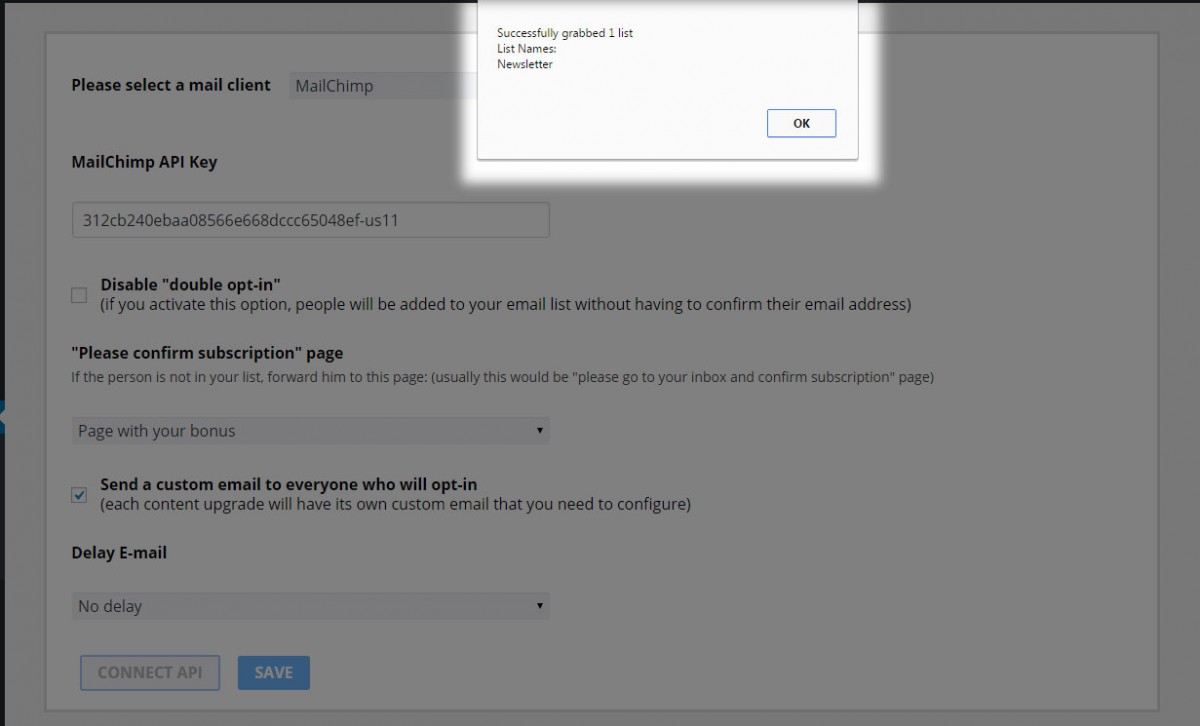
Click “OK” and then click “Save” button.
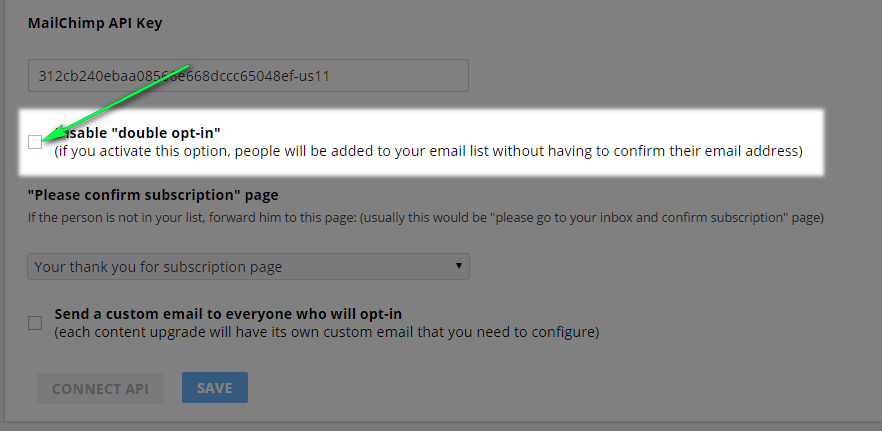
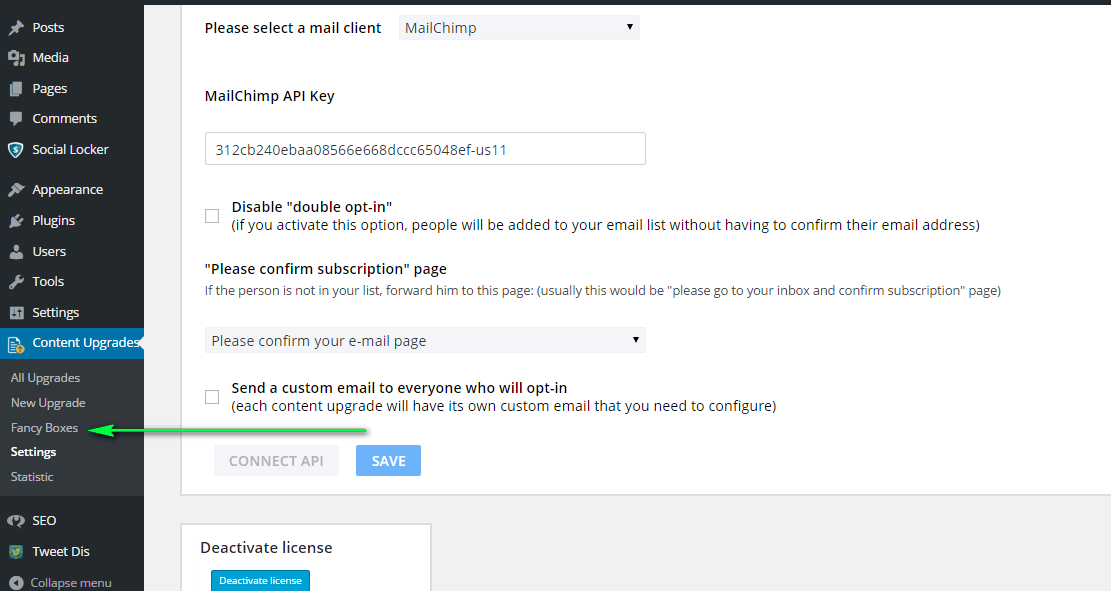
1.3. Double opt-in option
When “double opt-in” option is enabled, every new subscriber will get a confirmation email, where he must confirm his subscription before downloading the bonus.
When disabled, people will be added to your email list without having to confirm their email address.
Tick this box if you want to disable this option.
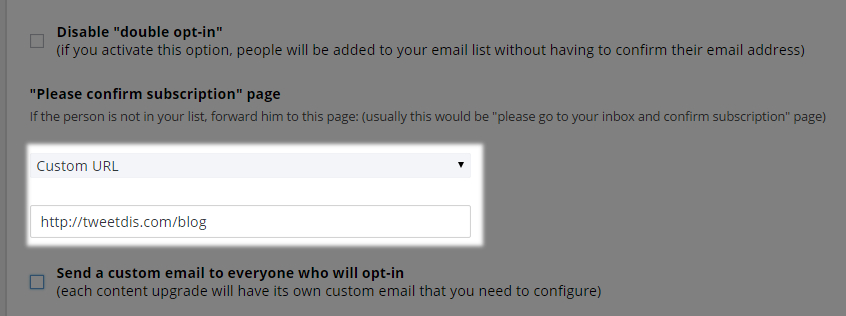
When double opt-in option is not disabled, choose the page, which will be shown to your new subscribers when they fill in their e-mail for the first time.
Usually, this page contains a message like “Please go to your inbox and confirm subscription”
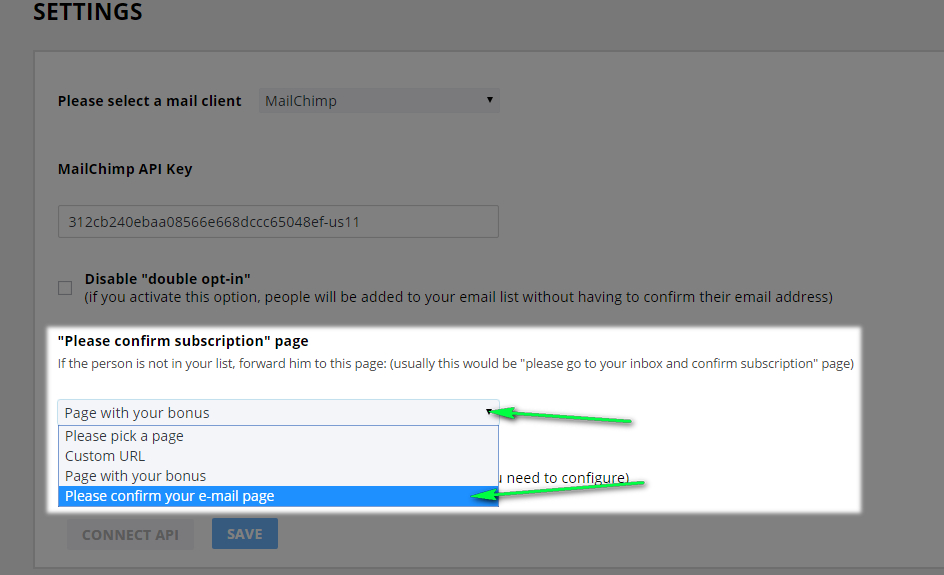
You can choose one of your WordPress pages (as shown in the image above) or enter a custom URL to link to any page.
1.4. Send a custom email to everyone who will opt-in
When this option is enabled, you can configure a custom e-mail for every Content Upgrade you create. And it will be sent to your subscribers at opt-in.
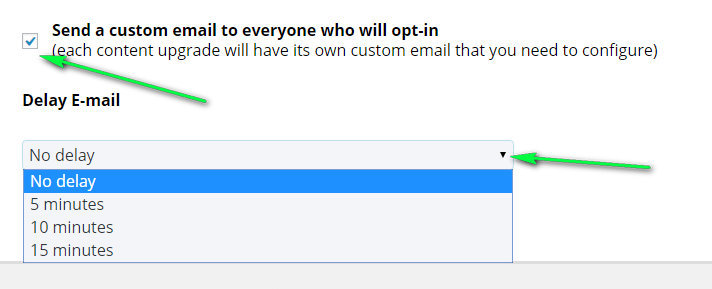
You can also set up a delay for this e-mail: 5,10 or 15 minutes.
To save any changes click “Save” button in the settings page.
1.5. License deactivation and license transfer
If you want to deactivate your Content Upgrades PRO license on a certain site and use it on another instead, click “Deactivate license” button at the bottom of the Settings page.
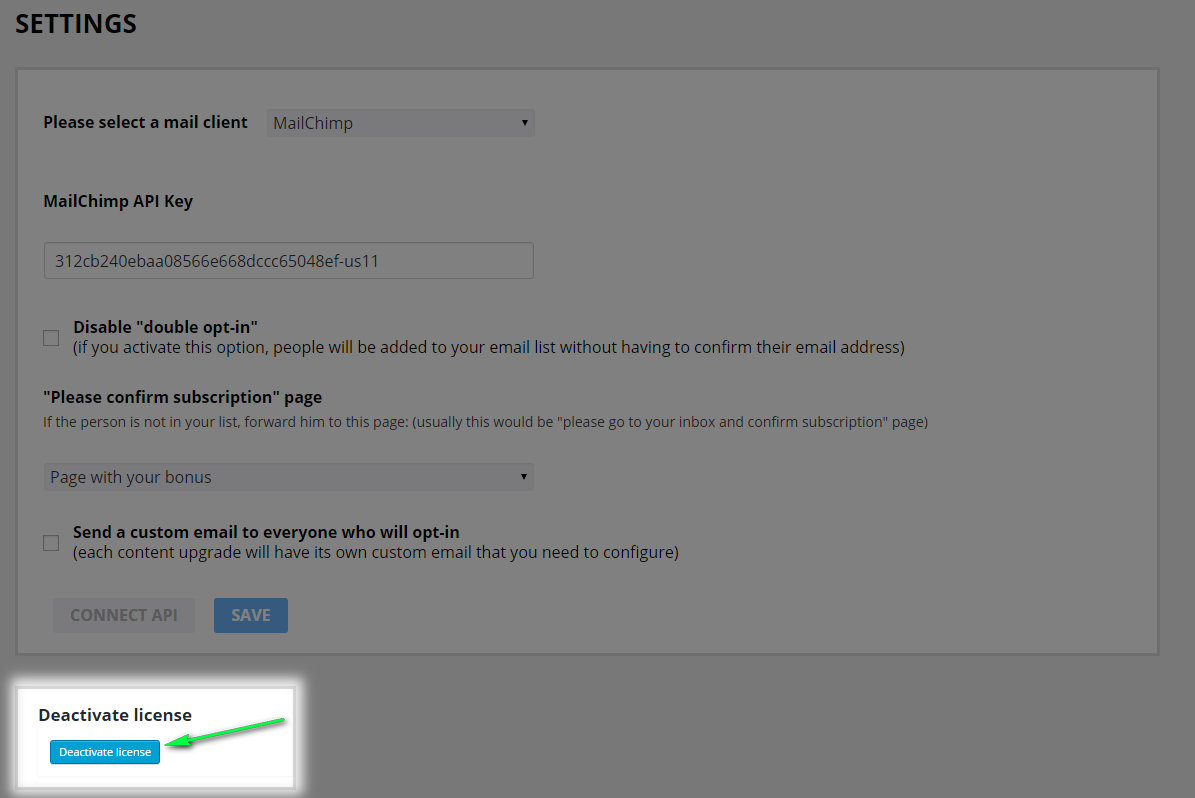
As soon as your license is deactivated, you can use it at any other site. Please remember that Muti-license can be used at 5 sites at one time and Developer license can be used on an unlimited number of sites.
2. Creating, editing and copying your Content Upgrades
In order to access upgrades edit/create page, click “All upgrades” in Content Upgrades PRO menu.
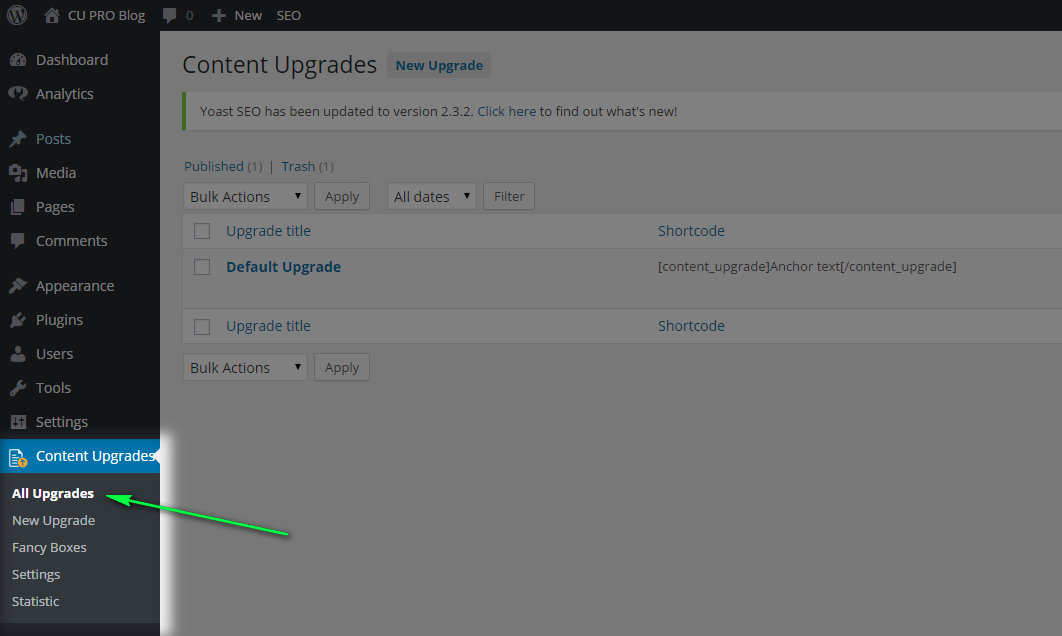
By default after plugin installation, you will have only one upgrade in your list “Default Upgrade”.
In order to create a new upgrade click “New upgrade” on top of this page or in the plugin menu.
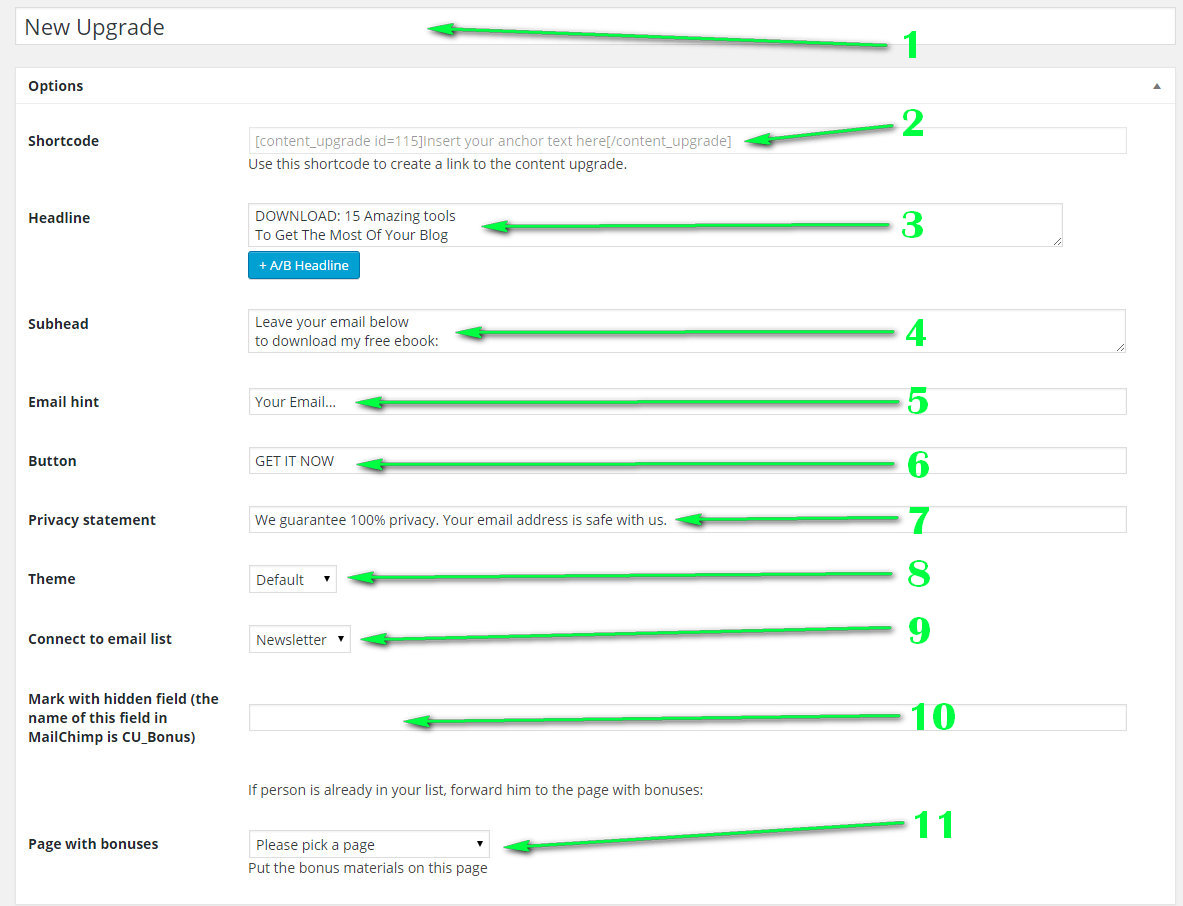
Here is a list of fields you can see when adding new upgrade or editing the existing one:
1) Name of the upgrade
2) Shortcode of the upgrade (can be pasted in your editor)
3) Headline (fill in your own headline)
4) Subhead (fill in your own subhead)
5) Email hint (prompting your visitor to enter his e-mail)
6) The button text
7.)Privacy statement
8) Theme (you can choose one of the 5 available themes)
9) Email list – choose an e-mail list, to which your new subscriber will be added (lists are set-up in your e-mail client)
10) Hidden field (you can mark your subscribers with a hidden field and track it in your e-mail client lists)
11) Page with bonuses – the page with bonus itself (can be one of your WordPress pages or you can use a custom URL)
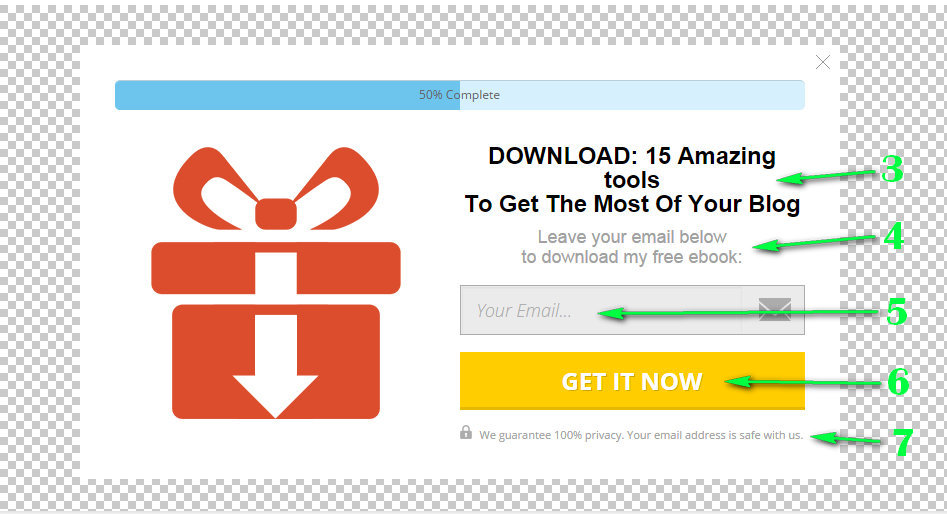
All the changes you make for the items 3), 4), 5), 6) & 7) will be shown to you in the preview window at the bottom of the page
If you want to create a copy of your Content Upgrade with all the setup, click “copy” button under the upgrade’s name in “All upgrades” menu.
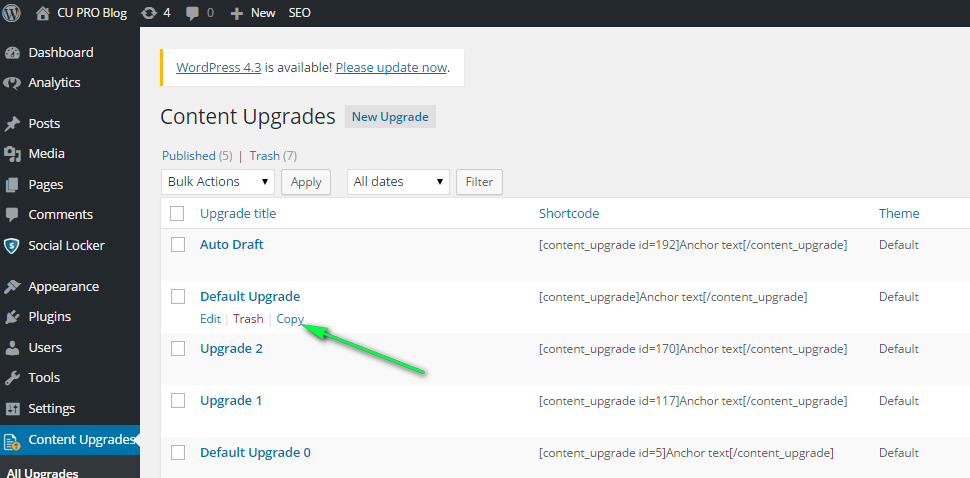
This will create a copy of the existing content upgrade.
3. Fancy Boxes
You can access the Fancy Boxes page by clicking “Fancy Boxes” line in Content Upgrades PRO menu.
In this page you can preview one of the 6 available Fancy Boxes to choose from. You can further use them for creating your Content Upgrades links.
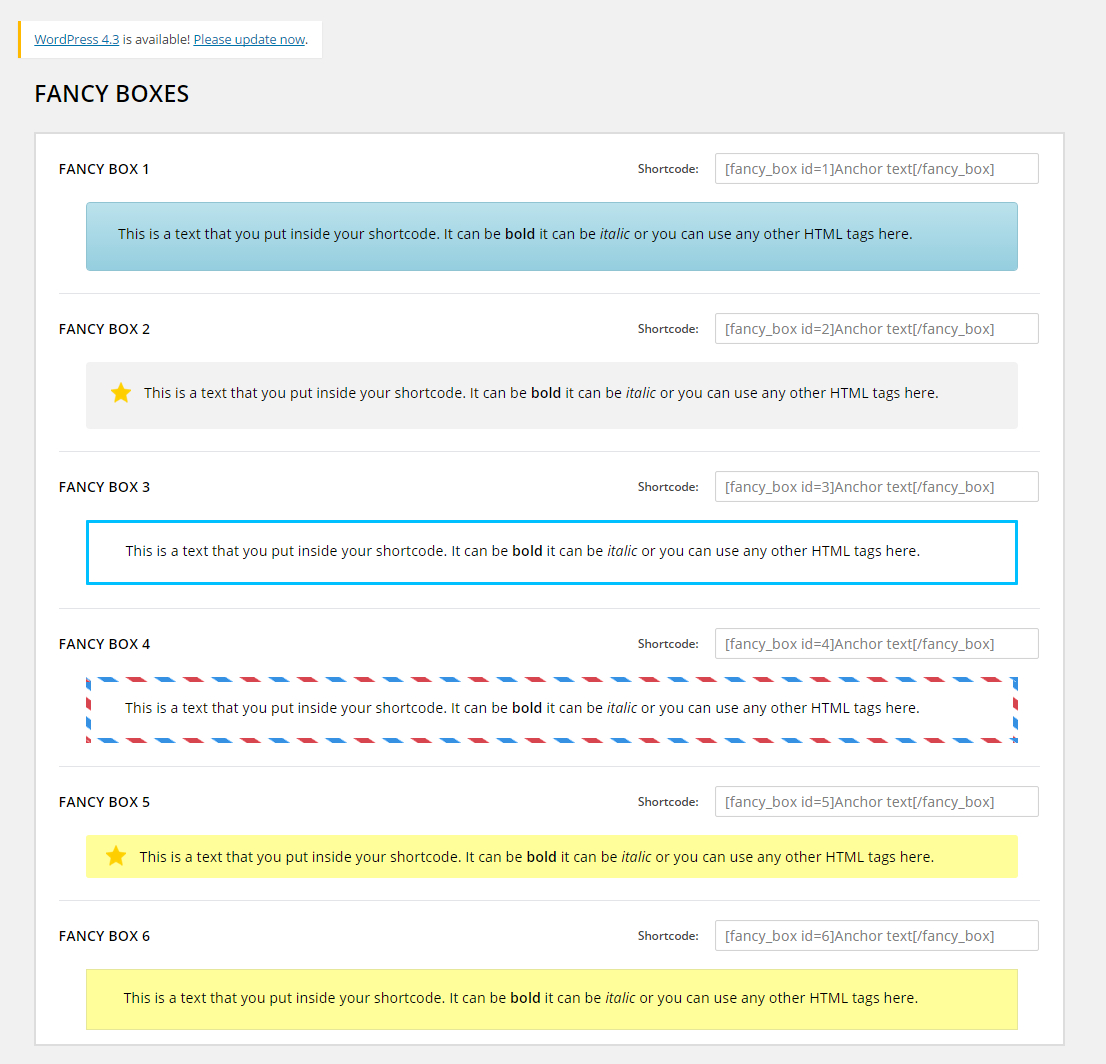
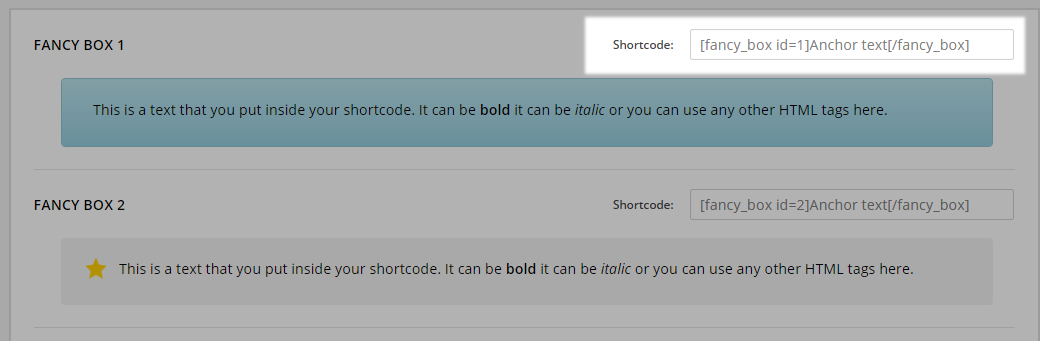
Each fancy box has a special shortcode which can be copied and pasted in your editor as an alternative method of adding Fancy Boxes.
You can find out how to add content upgrades and fancy boxes in section 4.
4. Adding Content Upgrade links and Fancy Boxes
4.1. Adding Content Upgrades in Visual tab of WordPress editor
1) Prepare the text that will be used as anchor text for your Content Upgrade link in the visual tab of your WordPress editor.
2) Select this text and click the plugin icon in the editor bar.
![]()
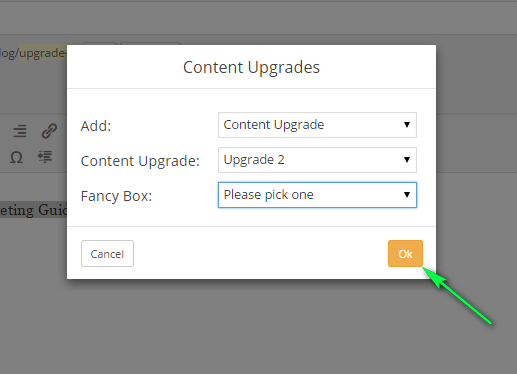
3) Choose “Content Upgrade” from the menu if you want to add a link inside a fancy box.

4) Select the Content Upgrade you want to add (one of the list of upgrades preset in “All upgrades” section).
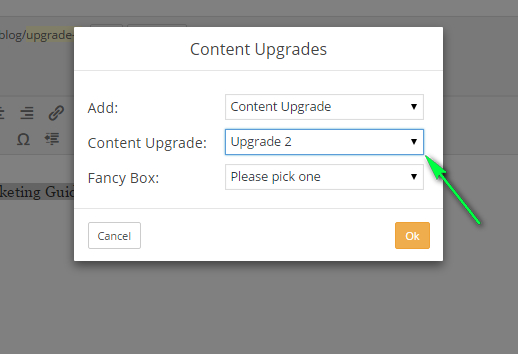
5) Select one of the fancy box designs.
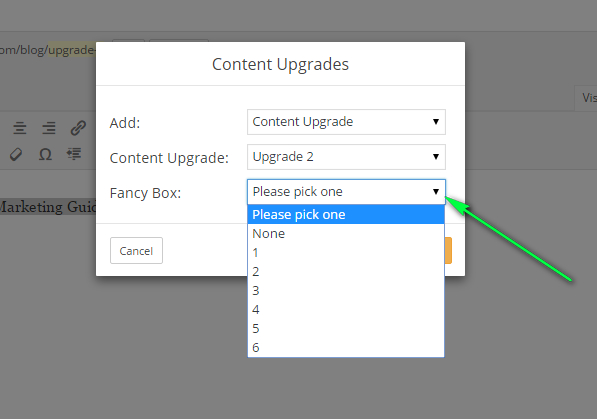 Note: choose “None” to add a Content Upgrade link without a Fancy Box.
Click “OK” button to add the Content Upgrade shortcode to the body of your page.
Here is a sample result you will see in your WordPress editor
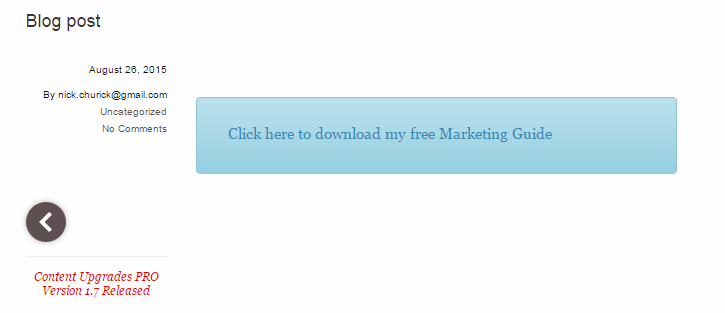
Result in page preview:
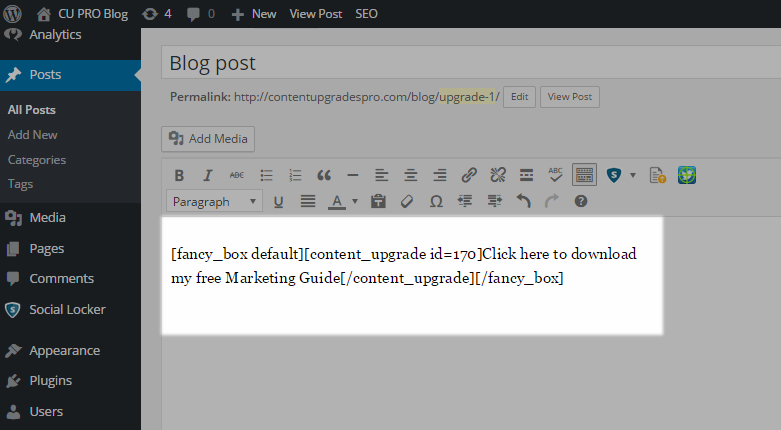
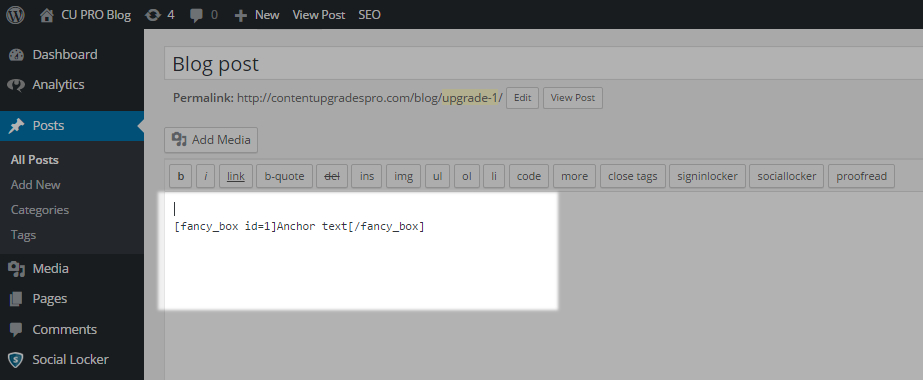
4.1. Adding Content Upgrades in Text tab of WordPress editor
1) Copy the shortcode of the Fancy Box you choose
2) Paste it in the Text editor window
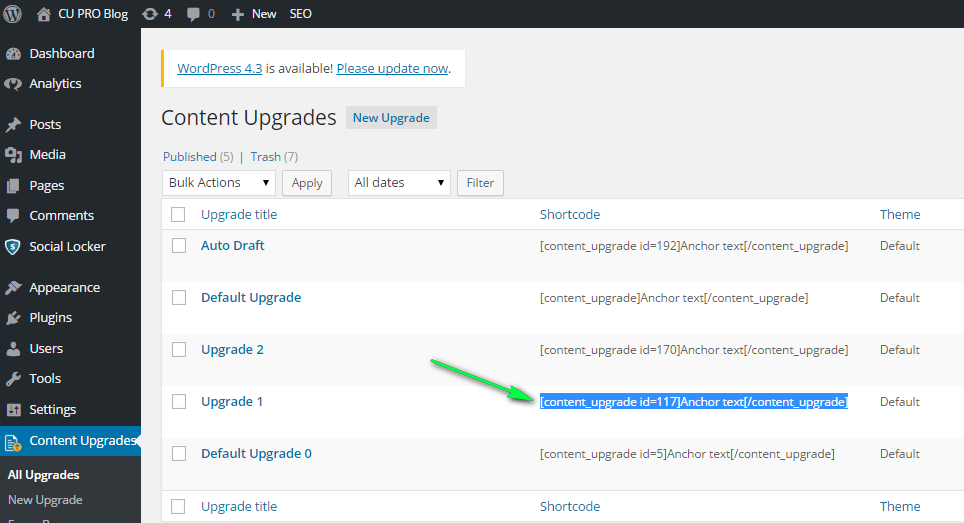
 3) Copy shortcode fo one of the content upgrades you want to add from “All upgrades” menu
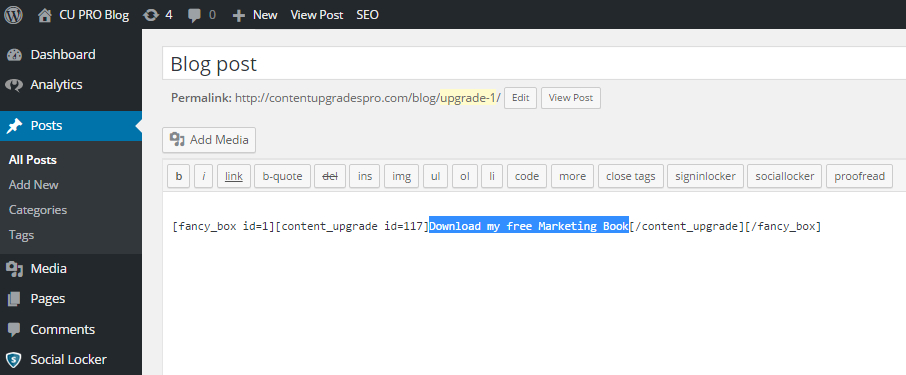
4) Paste it inside the Fancy Box shortcode in WordPress Text editor
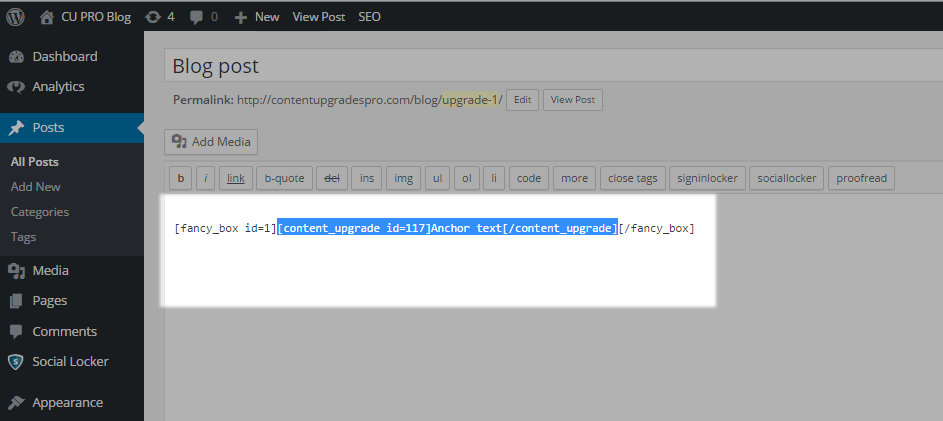 5) Replace “Anchor text” text with you want to use a link for your content upgrade
If you have any questions regarding our Content Upgrades PRO plugin, please don’t hesitate to use support form on our main page or contact me directly at nick.churick(at)gmail.com.
May our plugin serve you well to get tons of new subscribers!